DarkLordOfOptics
Politics • Science & Tech • Sports
Guns, Optics, 2nd Amendment and resisting the Left in everything they touch.
Interested? Want to learn more about the community?

Learn more first
Eyepiece Focus: FFP Precision Scopes

This is another subject that comes up with reasonable regularity. I did a couple of videos on focusing riflescope eyepieces a while back, but a bunch of people complained that it was too long and too technical. They were looking for something simple and to the point.
Simple and uncomplicated is not something I do well, so I figured I should try to put together a through the scope video that demonstrates the point. That turned out to be a little bit involved, but I think I've got a reasonable way of doing it. In the meantime, here are some general guidelines and the reason why this is a bit different with FFP scopes compared to SFP.

Do note that is a little different with LPVOs. Not very different, but still this applies to FFP scopes that do NOT go down to 1x. The video I am trying to put together to demonstrate this is ZCO 4-20x50.

1) Mount the scope on something steady. Do not do this handheld. If you've seen me do it handheld at SHOT or something like that, please pretend it never happened. I have adjusted hundreds, if not more, scopes over the years and developed a feel of sorts. Still, for my guns I do this on a steady platform of some sort.

2) Start out doing this with fairly bright lighting conditions.

3) Point the scope at something uniform and light colored (sky, wall, etc). The reticle should be the most prominent thing in your sight picture, so you eye focuses on it.

4) Set the magnification to something fairly high and slowly adjust the eyepiece focus to make the reticle perfectly sharp. Frequently look away from the scope at something distant. When you look through the scope the reticle should be immediately sharp without any time allowed for accommodation.

5) Once you converge on a reasonable setting, lower magnification to some setting where the reticle is clearly visible, but thin. Basically the lowest magnification where the reticle is still easily visible, but small. Repeat the adjustment process. This is finetuning, so go slow and give your eyes time to rest.

6) Repeat step 5 in somewhat lower light when your eye pupil is dilated half way or so. You will likely end up on somewhat higher magnification than step 5. This is more finetuning, so go even slower.

You should be done, but it is not a bad idea to check the setting in good light again at some future point. For most people, the eyepiece setting you converge on in step 6, should work across the board, but everyone's eye differ and sometimes you can end up with daylight setting and night time setting. I can always mark the two spots just in case if you need to switch, like you would if there were two users to the scope.

Lastly, with FFP scopes, the reticle is between the erector and the objective, so as you rack through the magnification range, with some high erector ratio designs, it is possible to have a spot where for one specific magnification, the reticle goes out of focus slightly. Make sure that in steps 5 and 6, are not sitting on one of those magnifications.

Interested? Want to learn more about the community?

Learn more first
What else you may like…
Videos
Posts
Articles
Vortex Defender XL Green

This is the second time Vortex' Defender XL crosses my path. I was very impressed with the original red dot version, so I was curious to see how the one with the green dot works for my eyes.
To get the details, see the attached video.
The cliff's notes version is that I am just as impressed with this one. In terms of collimation quality and parallax control, it is quite exceptional.
https://alnk.to/881BEV1

00:10:20
Primary Arms HTX-1 US Made red dot sight

I've had this RDS for a bit over two months now and I am beyond pleased with it.
Despite some spirited abuse, it keeps soldiering on.
https://alnk.to/1C9z5dw
It is a very nice RDS and being fully made in the US does not hurt either.

00:13:03
Delta Stryker 3.5-21x44 Wrap-up

This scope comes up a lot since I really like the configuration. It is time to do a final wrap-up of it.

It is one of my favourite scopes on the market today, especially for the money, since I naturally lean toward general purpose-ish designs. Still, while the 3.5-21x44 Stryker is relatively compact and light, it still clearly leans toward the precision side of things, which suites me very well.

https://annexdefense.com/optics-and-optic-accessories/delta-optics/

00:10:25
Labor Day is upon us...

As we head into Labor Day, we will all be bombarded with a huge number of emails indicating impending discounts of all sorts.
I am not even going to pretend that I have the bandwidth to go through it all, but if I see something worthwhile, I'll post it here. This will remained pinned to the top of the feed for a week or so.

The first nice deal that crossed my path here is steep discount on the original version of the FFP PLxC LPVO from Primary Arms. https://alnk.to/5Q7R6eK
Now that the new version with nuclear bright illumination came out, it looks they are closing out the original. It is a lot of LPVO for $1100 and the version with the Meters reticle is my favourite. You can easily make it work for imperial units.

Anarchy Outdoors has 15% off on stocks, chassis and magazines with LABORDAY25 code. Generally, it is 10% off sitewide with the same code. My relatively routine recommendation, as far as the products they carry go, is the Area 419 mount ...

I was a bit confused at the beginning but this is a new Model looking at the turret compare to old LH2-10x40,
Any news on this ?
https://www.amazon.com/Vortex-Optics-Razor-Second-Riflescopes/dp/B0FBMNTW52?th=1

Updates, deals and new review items: PLxC RDB, Zeiss Tripod, etc

As the week is coming to an end, I find myself in an unusual place: home.

I plan to be home between now and September 1st when I have to go to Israel for ten days, returning on the 11th (dayjob stuff).

For the last couple of months, between family vacations, work and a couple of matches, it seems like I only spent enough time at home to check zero on my 6.5CM Fix and head out again (it has not shifted, thank you Area 419 mount).

I have a lot to do during the next two weeks, but I will try to take some pictures, film some footage and release it as I go along. I can edit videos on the plane or in Israel just about as well as I can at home.

While generally, I am very picky about what I accept for review (given my bandwidth limitations), I do have a few new things here worth talking about.

One is Primary Arms new PLxC RDB 1-8x24 LPVO. It is essentially a version of the original FFP PLxC LPVO except with different reticle illumination technology. The new model utilizes diffractive reticle illumination (same style ...

Well, that was a doozy...

My original plan was to try to set up a hunt where my daughter will have her first memorable hunting experience without working too hard.

The choice of the pronghorn hunt was largely based off of my experience in that same area last year.

The way it went last year was quite straightforward.  We drove around until we saw a large pronghorn buck.  It was a solitary animal that decided to lie down in an open area to relax.  We made a short stock, crawled the last hundred yards or so, found a good spot about 350 yards away from the pronghorn and made the shot.

https://darklordofoptics.locals.com/post/6034347/well-that-was-a-nice-morning

This year, when I decided to take my daugher on the same pronghorn hunt on the day of her 14th birthday, I figured it will be somewhere along those same lines.  It kinda was, but not quite.

Still, it worked out nicely.

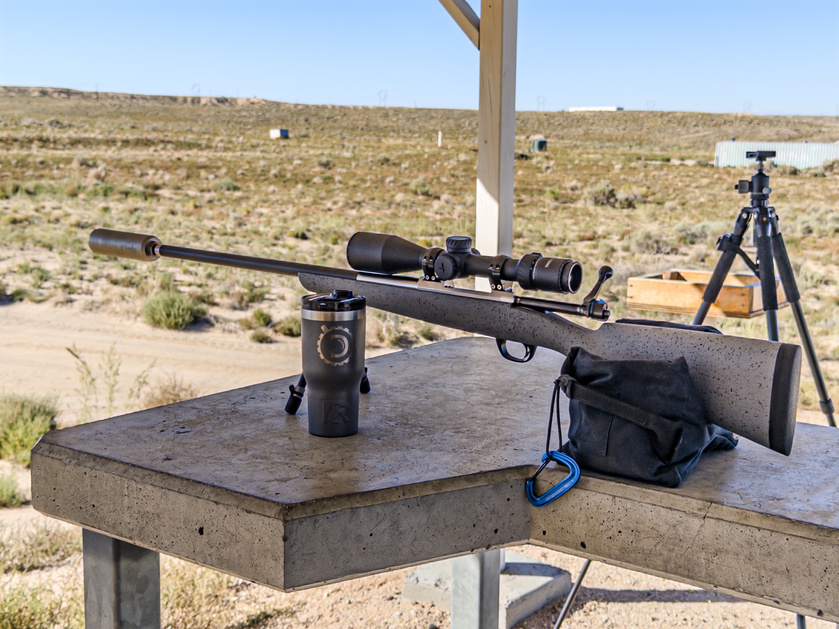
In the pciture:

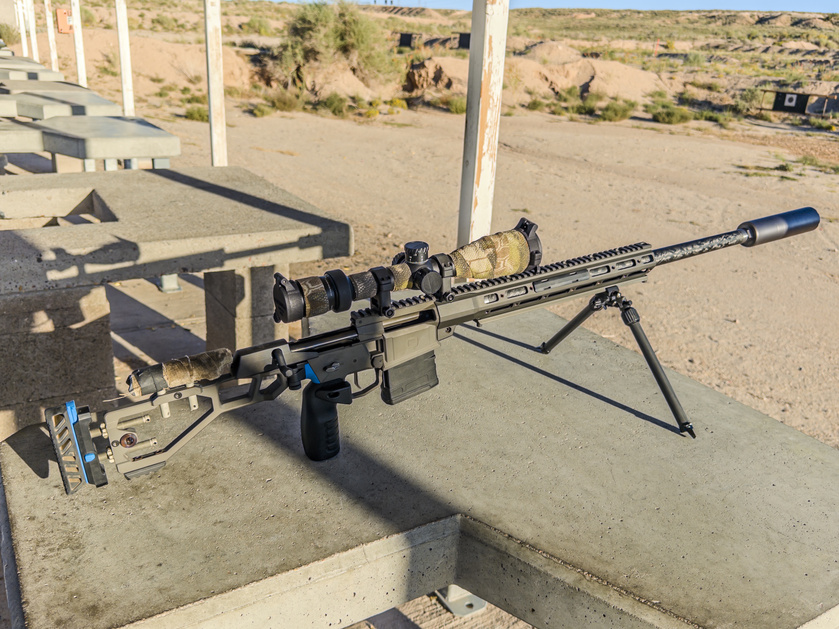
Q Mini-Fix with 6ARC 16" Proof Research carbon fiber barrel

Q Jumbo Shrimp supressor

Gunwerks Elevate 2.0 bipod

Telson Toxin 3-18x50 riflescope

Leica Geovid Pro AB+ LRF binoculars

Pint-sized sticky Gamechanger bag

Unnamed pronghorn buck.  It will likely get a name once it's skull is euro-ed and is hanging on the wall.

Only for Supporters
To read the rest of this article and access other paid content, you must be a supporter
Read full Article
Arming The Children
A couple of very specific children that is

In case you were wondering, no, I am not starting an underage militia.

I do have two kids though and I am teaching them to shoot.

Only for Supporters
To read the rest of this article and access other paid content, you must be a supporter
Read full Article
post photo preview
Steiner C35 Gen2 Mount
from Annex Defense

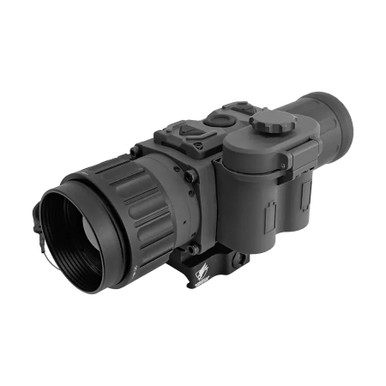
The production version of the Annex Defense's mount for the Steiner C35 Gen2 thermal Clip-on is finally here.  At $1600 (when this is published), the clip-on is an absolute steal.

I've had it for a few days, but, me being the good old paranoid me, I spent some time shooting with it before posting anything.  I had a couple of days with it prior to last weekend's match in Montana and a couple of days after.  Another to pop it on and off a few times and get a couple of hundred rounds of 6.5Grendel through the gun to see if anything shakes loose.  So far so good.

The C35 Gen2 clip-on is sitting on my 6.5Grendel AR as a part of a long running "Only One" project that I have.  It pairs perfectly with the Steiner H6Xi 2-12x42 scope.

Here is what comes in the box from Annex Defense:

The order in which the whole thing comes togethe is pretty stragihtforward:

-slide the thermal washer onto the threaded interface extending out of the back of the clip-on

-spin the mount itself onto the threaded interface (the mount is threaded on the inside) until it can go no further

-rotate the mount so that the clip-on is properly lined up to the picatinny clamp

-once you are happy with the alignment, use the three nylon tipped set screws (you'll need an allen wrench for that) to lock in the position of the clip-on in the mount.  You need very little torque on the set screws.  They are there for one reason and one reason only: to keep the mount from spinning when you tighten the timing nut in the next step

-spin the timing nut onto the threaded interface of the clip-on to lock the mount in place.  You should not need the timing nut wrench, but one is in there just in case.

Here are the pieces laid out in the order in which you will need them.

When you are done, it should look like this:

Note that the mount normaly comes with two T20 screws.  I am using two thumbscrews instead, since I am popping the mount on and off all the time.  It seems to be staying put with the thumbscrews just fine.  I am hoping Annex will offer the thumbscrews as an option.

It is not quite an equivalent of a QD mount, but we needed something with an extremely low profile clamp to fit under scopes with fairly large objectives.  As is, the mount works with most scope that have objective lens diameter of 50mm or less.

I am using with with Steiner H6Xi 2-12x42 and the two work together exceedingly well.

Read full Article
Available on mobile and TV devices
google store google store app store app store
google store google store app tv store app tv store amazon store amazon store roku store roku store
Powered by Locals